How to fix a leak in your SUP board
11 noviembre 2021
Supping is one of the most popular sports in the world! It is perfect to train all of your muscles while you are taking time for yourself on the water. But it could become very frustrating when the board is not getting hard. There is probably a leak somewhere on the board. In this blog, we’ll learn you how to fix a leak in your SUP step by step!
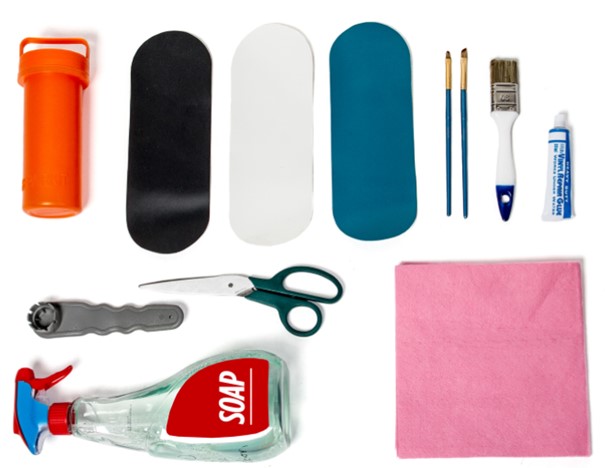
1. Get the right tools for fixing the leak
You’ll need the right tools to fix the leak. Some of them are in the repair kit which came with your SUP package. Besides the tools provided in the package, you’ll need scissors, soap and a piece of cloth.
2. Make sure the surface is clean
It is very important to clean the surface around the leak. If the surface is not clean the glue won’t heal as good as on a clean surface. If you can’t find the leak you can locate it with some soap. Put some soap around the leak and you’ll see bubbles around the leak!
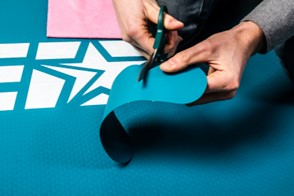
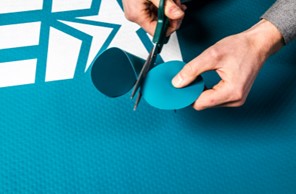
3. Cut out a circle that covers the leak
You’ll need to fix the leak with the patches that came in your repair kit. You can cut out a circle (or any form you’d like) to cover the leak. Make sure that it’s big enough to cover the whole leak!
4. Apply some glue on the patch and on the board
If the patch is ready you have to apply the glue. Take a brush and put some glue on the patch and on the surface of your SUP. Use the brush to spread the glue on the patch and on the board. Make sure that you start at the center and work your way to the edges. You have to make sure that there is enough glue applied on the board with the size of the patch.
5. Apply the patch on you board and make sure it sticks
When there is enough glue on the patch and surface it’s time to apply the patch to your board! Make sure that the patch sticks good on your board. If so, you’ll be able to clean the rests of glue around the patch. If needed, you can use aceton to remove the glue!
6. Done!
This were all the steps to repair your inflatable SUP board from a leak, but this will be the hardest part. You have to let your board rest for 24 hours before you can use it again! But once done, you’ll be able to hit the water with SUP which won’t leak anymore!
 0Carrito